


This tutorial explains to you how to show an alert or popup notification in Angular 11 with SweetAlert2 npm package. We will learn how to use SweetAlert2 in angular altogether, and learn how to display the alert boxes with user-centric information.
The SweetAlert2 is a powerful library, and it offers a beautiful, responsive, customizable, accessible (WAI-ARIA) replacement for JavaScript’s popup boxes with absolutely zero dependencies needed.
Plugin team did not show the single sign of recklessness while creating this plugin. If i talk about the popularity of this plugin, then it is being downloaded possibly 204,002 times per week, that tells a lot about their prudence and austerity itself.
Angular 11 SweetAlert Popup Notification Example
Install Angular Application Run the following command to install the latest version of Angular CLI.
npm install -g @angular/cli@latest
This step consist of installing a fresh angular application on your development machine.
Run the following command, answer some questions asked by angular CLI.
ng new angular-sweetalert-demo

? Would you like to add Angular routing? No
? Which stylesheet format would you like to use?
❯  CSS
 SCSS   [ https://sass-lang.com/documentation/syntax#scss                ]
  Sass   [ https://sass-lang.com/documentation/syntax#the-indented-syntax ]
  Less   [ http://lesscss.org                                             ]
  Stylus [ http://stylus-lang.com
You can opt for any styling format like for me I love CSS SCSS, SASS or LESS for my project.
Excellent, the installation is completed.
Get inside the project folder.
cd ng new angular-sweetalert-demo
Run the command in your terminal:
npm i sweetalert2
Note: This will Install SweetAlert2 npm package for displaying beautiful notifications and alert in angular 11.
Note: In order to show attractive notifications to users, you have to first incorporate the sweetalert2 CSS path in angular.json file.
....
"styles": [

      "src/styles.css",
      "node_modules/sweetalert2/src/sweetalert2.scss"
    ],
....
Register SweetAlert in App Component
In this step, we will register the required imperatives (package services) in order to invoke the notification messages via sweetalert2 package.
Here are the methods we need to define to maintain the order of precedence for opening the SweetAlert alert in angular on click event.
- tinyAlert()
- successNotification()
- alertConfirmation()
Place the given below code in app/src/app.component.ts file.
import { Component, OnInit } from '@angular/core';
import Swal from 'sweetalert2/dist/sweetalert2.js';
@Component({
selector: 'app-root',
templateUrl: './app.component.html',
styleUrls: ['./app.component.css']
})
export class AppComponent implements OnInit {
ngOnInit(){
console.log('Life Cyle Hook with spontaneous response.');
}
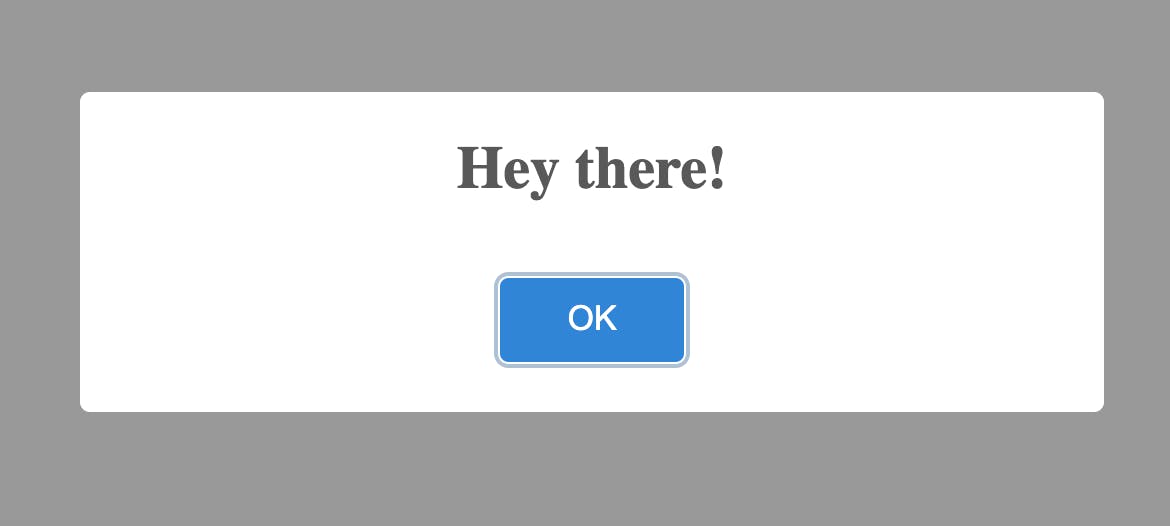
tinyAlert(){
Swal.fire('Hey there!');
}
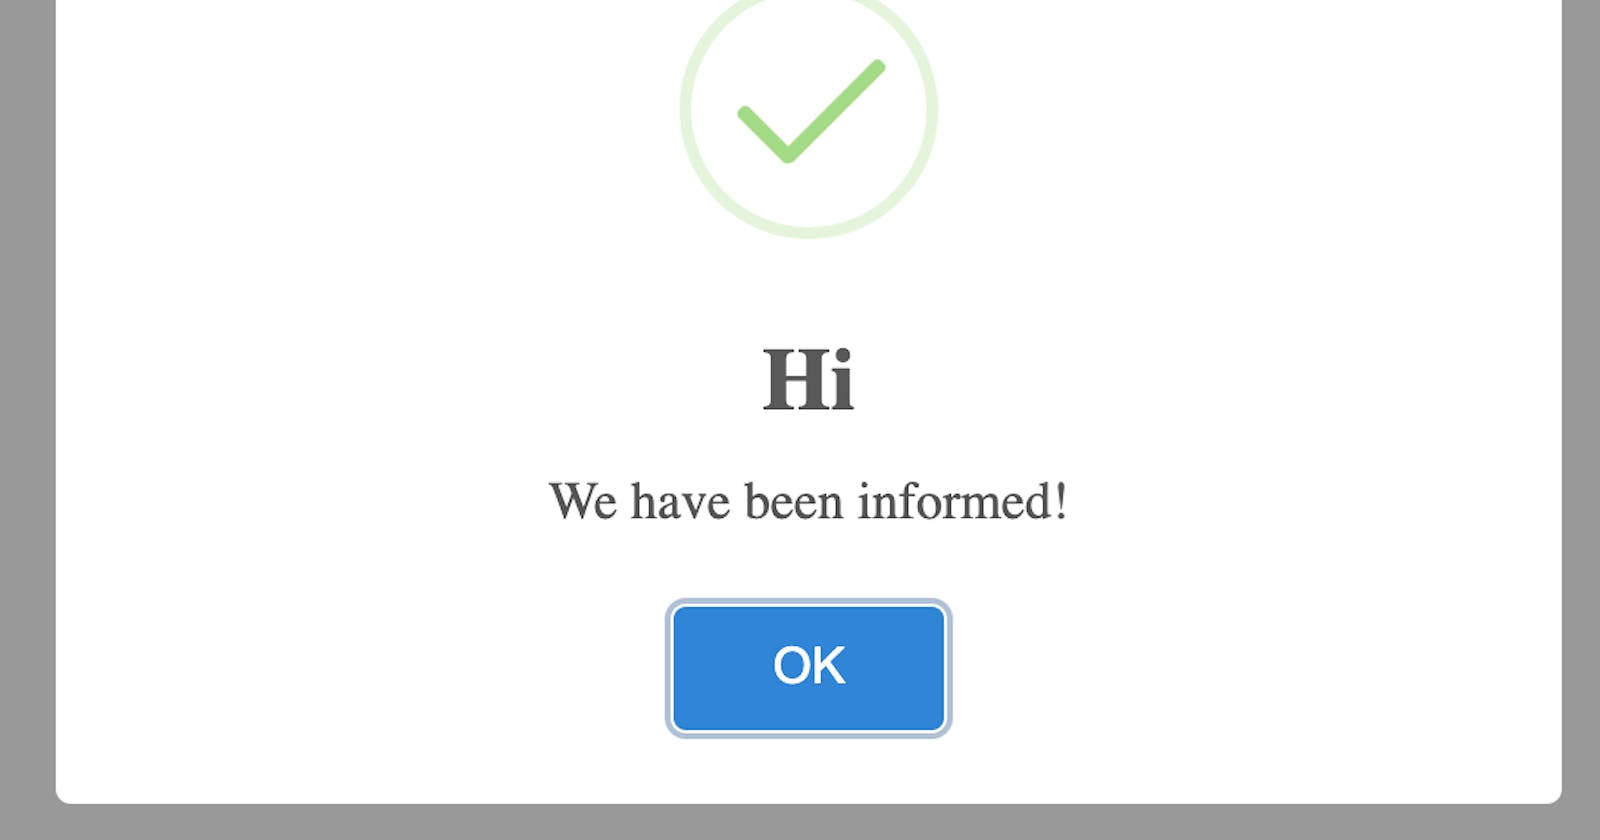
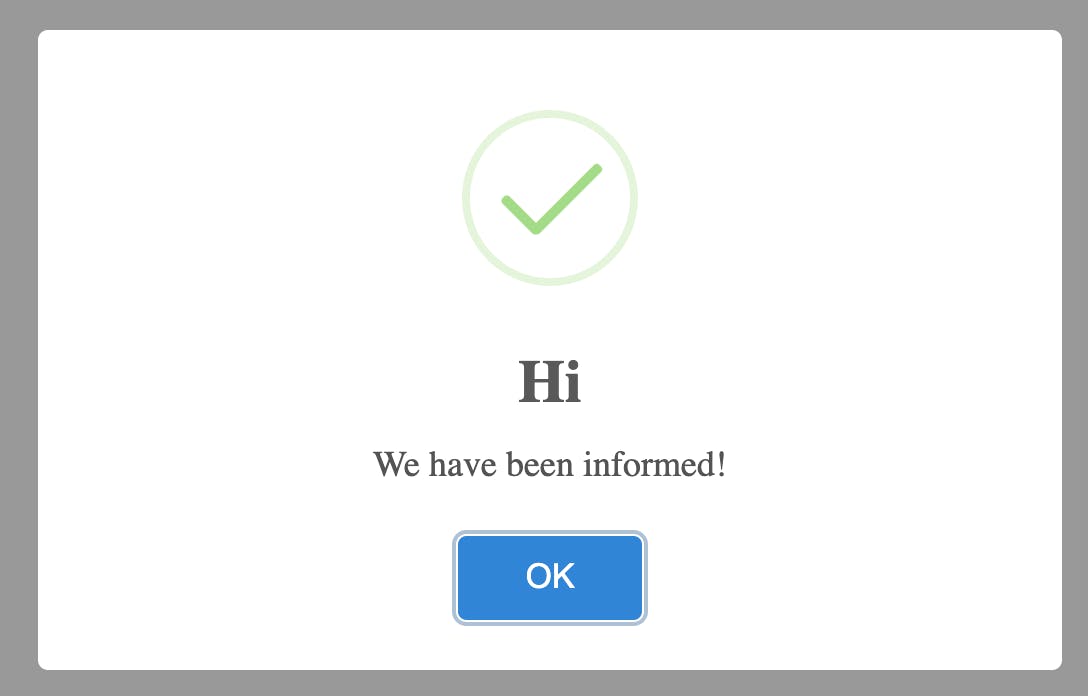
successNotification(){
Swal.fire('Hi', 'We have been informed!', 'success')
}
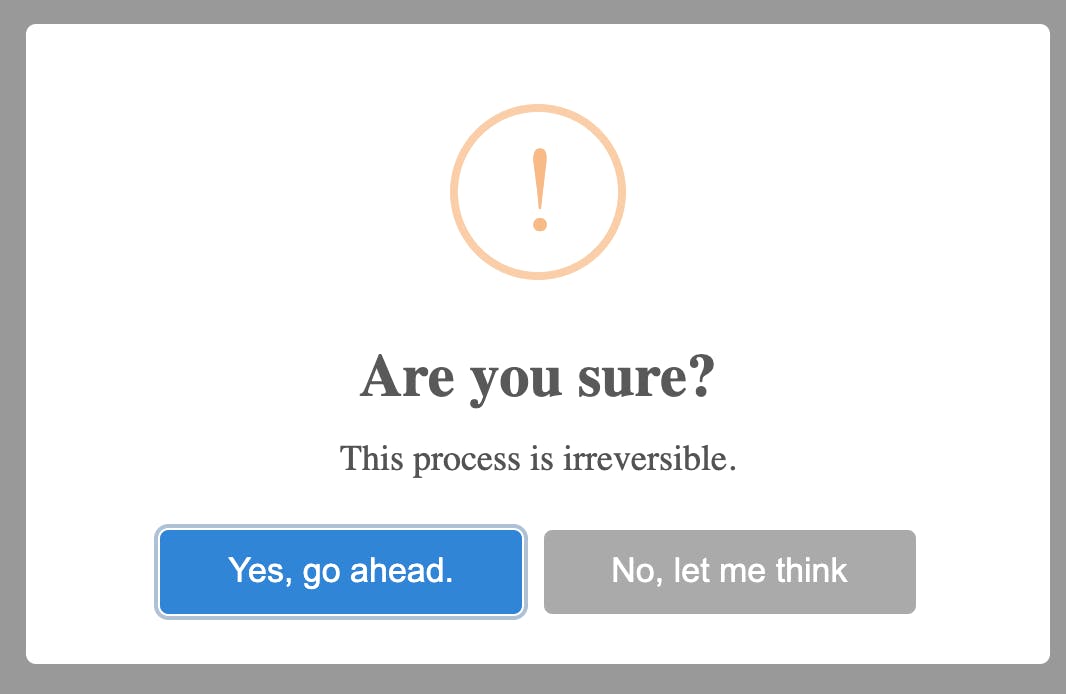
alertConfirmation(){
Swal.fire({
title: 'Are you sure?',
text: 'This process is irreversible.',
icon: 'warning',
showCancelButton: true,
confirmButtonText: 'Yes, go ahead.',
cancelButtonText: 'No, let me think'
}).then((result) => {
if (result.value) {
Swal.fire(
'Removed!',
'Product removed successfully.',
'success'
)
} else if (result.dismiss === Swal.DismissReason.cancel) {
Swal.fire(
'Cancelled',
'Product still in our database.)',
'error'
)
}
})
}
}
TypeScriptCopy Display Notification In this last step, we will spontaneously Display Alert and Notification Popup in Angular with SweetAlert library and the custom methods that we developed in the previous step.
Place the given below code in app/src/app.component.html file.
<button (click)="tinyAlert()">Simple Notification</button>

<button (click)="successNotification()">Sucess Notification</button>

<button (click)="alertConfirmation()">Show me Confirmation</button>
Run The Server
ng serve
or
ng s
Above command opens your app automatically on the browser, then the following output on your browser screen after clicking on any of the buttons.
Conclusion Eventually, we have everything working fine in our application.
In this tutorial, we have discussed foundational steps to integrate and to use SweetAlert2 library in Angular. I am sure you would have comprehended the entire process by now.
We developed three essential alert boxes to notify users from absolute zero. i hope you found this helpful. It will help you elevate your skills in Angular and SweetAlert2.
Kindly like and repost for others to learn